Strategy guide: how to win more duels
Cleaver Duel is a game of reads. There is no luck and no random damage; every hit happens because one player predicted the other. This guide breaks a match into phases and gives concrete habits that win more rounds.
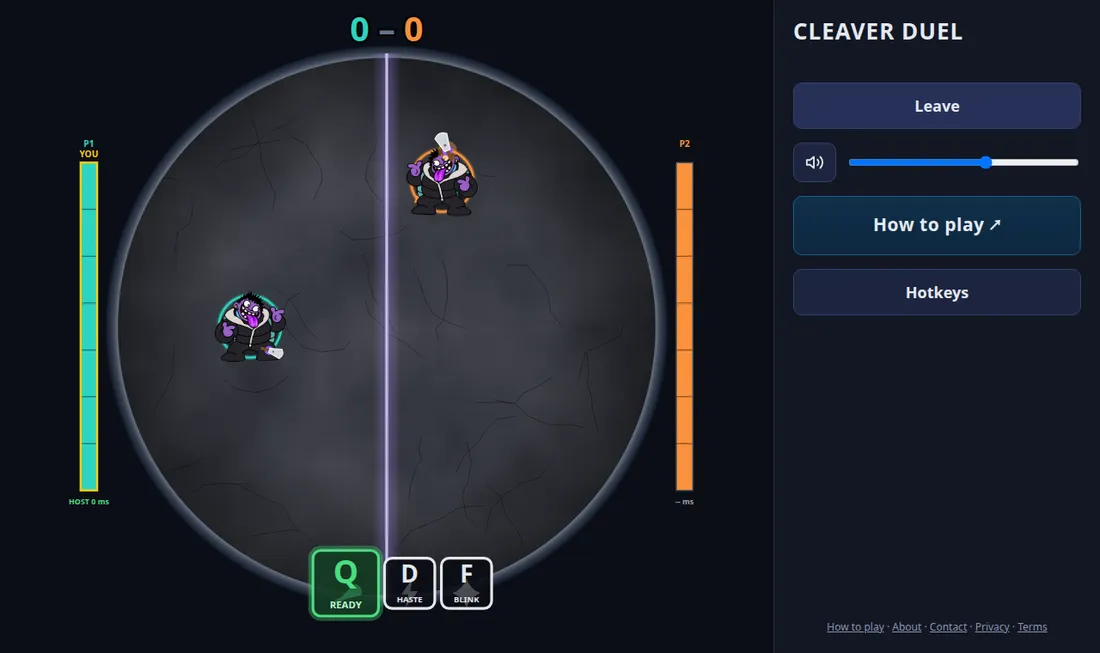
Phase 1: the opening (first 10 seconds)
When the countdown ends both players have a ready cleaver. Nobody wants to throw first and eat a 3-second cooldown while the opponent still has theirs, so the opening is a staring contest. The best habit is to move constantly in small, unpredictable arcs rather than standing still. A target that holds a straight line is easy to lead; one that changes direction every half-second forces the other player to guess.
Start by moving toward the mid-wall rather than away from it. Your distance to the enemy is what makes your cleaver hard to dodge, and a close cleaver arrives before the opponent can react.
Phase 2: trading cooldowns
The key concept is the cooldown window. When your opponent throws, they are rooted for 0.18 seconds, then locked out for 3 seconds. During those 3 seconds you can stand in the open without fear. If you land your cleaver in that window you also slow them, so your follow-up lands more easily.
- Throw on their cooldown, not yours. A cleaver thrown into the opponent's ready cleaver is a gamble; a cleaver thrown after they have just spent theirs is a free attempt.
- Count to three. Count the seconds after they throw. At two and a half seconds, start moving again, because their next cleaver is about to be ready.
- Do not panic-throw. Missing leaves you rooted and cooling down with the opponent ready, which is the worst possible state.
Baiting the wind-up
Every throw starts with the 0.18-second wind-up where the brute raises the cleaver. You can use that visible telegraph to bait: walk toward a line where the opponent will want to throw, wait for the wind-up, and sidestep perpendicular to the cleaver's path. Because a cleaver needs about 0.36 seconds to cross half the arena, you will almost always dodge a cleaver thrown from far away if you react to the wind-up, not the cleaver itself.
The opposite also applies: at close range you cannot dodge on foot, so do not let the enemy reach point-blank distance with a ready cleaver unless you still hold Blink.
Using the mid-wall
The wall splits the arena, and while cleavers fly over it, players cannot cross it. Hugging the wall shrinks the opponent's angles: a cleaver thrown from the far side of the arena at a target against the wall has only one line to travel along, so you only have to dodge along that line. Use the wall to narrow your own threat directions, then step out to attack.
Managing Haste and Blink
You get one of each per round, and the player who still has them in sudden death is usually the favorite. A reliable rule of thumb:
- Spend Haste first if you must spend one, since it can also be used offensively.
- Keep Blink for a throw you truly cannot dodge, such as a close-range cleaver when the wall is down.
- If both are gone, play the safest spacing you can and make the opponent come to you.
Phase 3: sudden death
When a player has one life left (100 HP or less) the wall falls and the arena becomes one open circle. The player with more health now has to avoid a single lucky hit, while the player behind has nothing to lose. Read our sudden death guide for the full plan.
Common mistakes
- Standing still while your cleaver is on cooldown.
- Throwing every time the icon turns ready, regardless of position.
- Using Blink to run away at long range, when walking would have worked.
- Spending Haste and Blink before sudden death, then having no answer when the wall falls.
Practise against the bot
The bot is a safe place to try these habits. It moves around the arena and throws cleavers at you, so you can practise reading wind-ups and counting cooldowns before facing a friend.